How to easily redo a kid’s closet and adjust it as they grow
When we bought our house, we had one kiddo and she was 9 months old. It was our first home purchase and after months of looking was the first one we both liked. Of course there were things that we knew we would eventually need to change. Closets weren’t one of them, but when we kept having kids, we knew something had to give. We didn’t know exactly how to redo a kid’s closet, but we looked around the store and decided on what we thought would work!

Of note, these are obviously very real pictures of our kids’ closet. Yep, it’s not perfectly photographed and professional. Maybe it will feel more like your house…or maybe not!
Putting in low racks for smaller kids
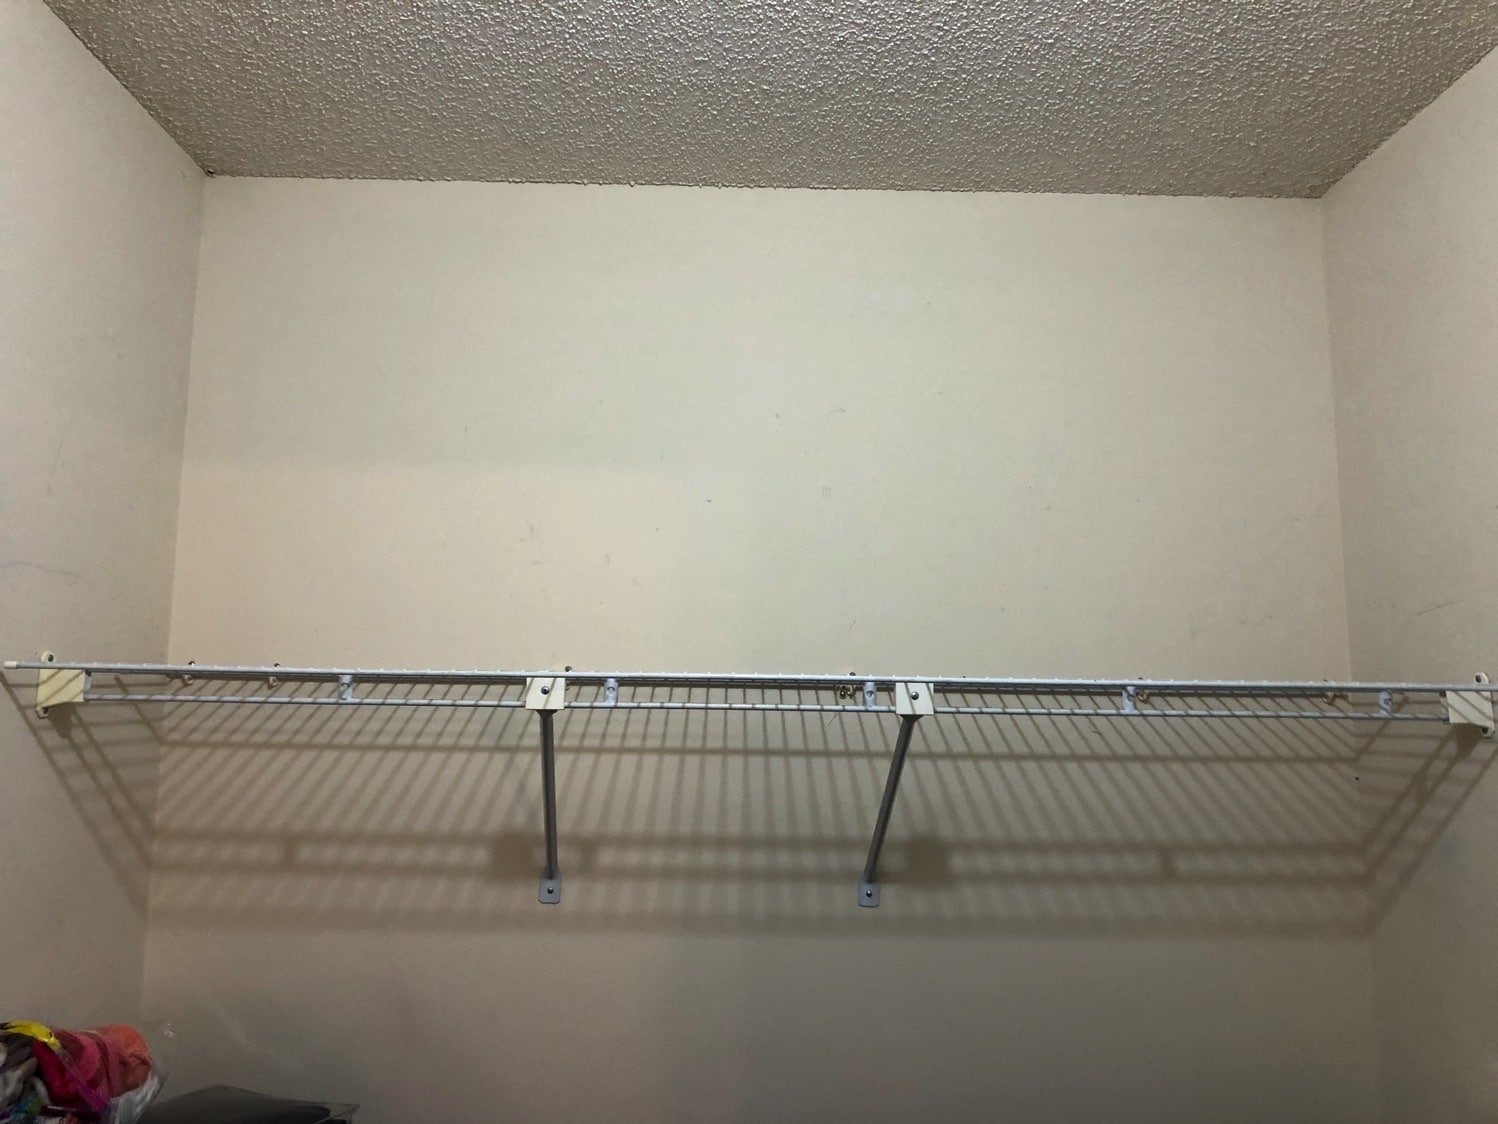
The original closets were all technically walk-in, but configured in a very illogical and not useful way. And they were those wire shelves that make it difficult to slide hangers. As our oldest two were getting older and able to put their clothes away, we needed to make it feasible for them to reach their closet racks.
Where the main rack was on the wall straight back, we decided to use the side walls to put shelves and racks at a lower. You can see the original shelf up in the back of the closet. We decided to leave it when we installed the new shelves in the even that we needed to hang something longer. It turns out we never needed it.
Tools and parts you will need:
For our first go round, we used a cordless drill (which we never have charged when we need it! I’m sure I’m not the only one alone in this.) The girls were very helpful in fixing their closest so they could actually use it.

There was a lot of drilling necessary, both in the walls and the shelves. Cut once and measure twice….or use a level and mark you holes before you start drilling.
Tools you will need:
- Cordless drill and later a corded drill (because it doesn’t need to be charged)
- Level
 (unless you want crooked shelves)
 - Stud finder (so many jokes here!)
- Drill bits for pre-drilling holes in shelves and walls
- Pencil for marking the wall and shelf
 (unless you want crooked shelves)
 (so many jokes here!)
 for pre-drilling holes in shelves and walls
Parts / supplies you will need to redo a kid’s closet
We purchased all of our parts and supplies from our local home improvement store, but I’ve found them also on amazon for surprisingly similar prices (except the actual shelf). We also happened to have extra screws for troublesome areas.
All of this depends on the length of your wall and the location of your studs as each heavy duty shelf and rod bracket required a stud to be installed safely and properly. One support bracket is recommended every 16-inches for installation.
For each wall we purchased:
- 3 heavy duty shelf and rod brackets
- 1 adjustable closet rod
- 1 heavy duty closet pole sockets (allows the pole to go all the way to the wall)
- 1 shelf
You can see all of the pieces here except the pole sockets that go at the ends of the polls on the wall.

We measured the height the girls could reach and their clothes could hang without hitting the floor and installed the brackets first. Then we put the shelf on the brackets and attached the sockets to the ends of the poles.
The longest part of the process was locating the studs and getting the screws into the studs.

In less than two hours (I’m pretty sure we took a break for dinner in the middle), the closet was reorganized and way more functional for our girls. We even added an over the door shoe organizer not for shoes, but for various things like lotion and combs and headbands that don’t fit in the bathroom.
Making closet adjustments as the kids get older
As the girls got older and taller, we realized that their closet was no longer working. Dresses and even shirts were dragging on the floor. Initially we set out to make a second taller shelf, but realized how silly that was because their dresses still wouldn’t hang the full length.
Instead of complicating things too much, we just moved those same brackets and bought new shelves that were slightly deeper up to the height of the previous back shelf. We went from the minimum for the brackets of 11” to 14”. Oh, and we finally removed that back shelf that wasn’t functional.
Now the closet works for full-sized adult clothes (because yes, our 12 year old is almost as tall as I am!)

Then the girls switched rooms, and our 6 year old had a TON of clothes. She also had issues reaching the top shelf. Instead of moving the brackets again, I picked up a very inexpensive double closet rod. This hangs from the top shelf but gives her a lower rack to hang clothes on. It’s also nice because it’s adjustable, so she can use it for just a short width or the full span of the closet.
The take home message:
It doesn’t have to be perfect to get it done. It’s functional, the girls are happy and we are happy. Sure, we still haven’t patched up the holes from the old shelves, but nobody is bothered. This is real life with non-matching hangers and clothes askew. But, it helped us a ton and we totally went into in blind, so hopefully this helps you with your not-so-functional closet and inspires you to get the project done.